As I didn’t have a lot of experience with this, I checked the internet for a solution, but that was not easy; there is some information, but fragmented and not very complete.
After consulting some of my colleagues and reading some resources I managed to configure the desired solution. It turned out not to be that complicated. You just have to be very precise about it, since it relies on a couple of different bits and pieces and if one of them is not configured properly, the entire solution fails.
That’s why I decided to share all steps and parts in this scenario in this series of 2 blog posts. This part will introduce 2Way SSL Authentication and show how to configure a client in BizTalk using the WCF Adapter. In the next part I will show how to configure a service in BizTalk and IIS for receiving messages using 2Way SSL.
First an introduction to TwoWay SSL authentication:
Two-way SSL authentication using certificates means that 2 parties authenticate each other by verifying the presented certificate.
These certificates consist of a private part and a public part. The private part is used to identify yourself (this is secured by a password, and should be handled with care) and the public part is used by the other party for verification purposes. If you want to communicate with someone, you hand them the public part and keep the private part for yourself.
Certificates are issued by a Certificate Authority (CA). The certificates contain information about the CA, so the other party can check with the CA to determine whether the certificate is valid. To do this you have to trust the CA who has issued the Certificate. Examples of these trusted CA’s are Verisign and Global Sign.
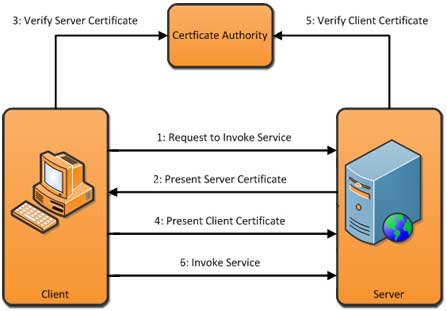
- Figure 1: Steps involved in 2Way authentication
Configuring a WCF Send Port
Now let’s dive into BizTalk.
Let’s say we already generated BizTalk artifacts, deployed our solution and tested it against SoapUI using the default generated bindings.
So now we want to send the messages to an external webservice using 2Way authentication, first we have to see if we have everything we need:
- We need the public key of the Server Certificate of the external webservice
- Make sure it’s installed in the Local Computer’s Certificate Store of the server under trusted people
- Check if the certification path is valid by double clicking the certificate and checking the tab “Certification Path”:
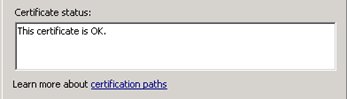
- If it’s not OK, we’re probably missing the certificate of one of the issuers in the Certification path.
- We need a private certificate to identify our self (purpose = Client Authentication)
- Make sure it’s installed in the Personal Store of the account that is used to run the BizTalk host instance, which is configured to run the send port you want to use
- Send the public key to the external party
Now we’re ready to open the BizTalk administration console.
First we will set the basic transport properties:
Browse to your send port, double click it and make sure to use the WCF-Custom Binding.
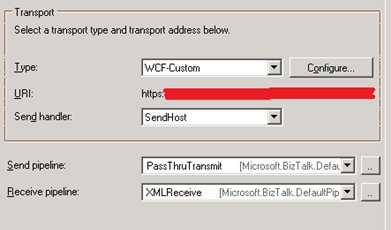
Click “Configure” and enter the address of the webservice (starting with https).
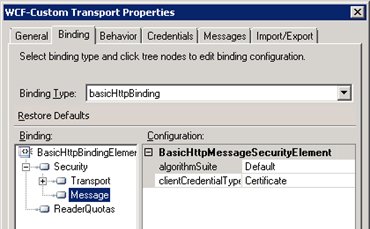
Go to Tab “Binding” and make sure all items of the BasicHttpBinding element are correct.
Now Click “Security” and select transport.
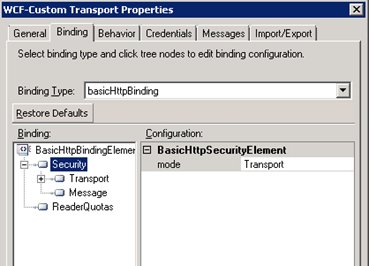
Now click “Transport” and select “Certificate”.

Do the same for message.
At this point we will set the credentials, in this case the certificate:
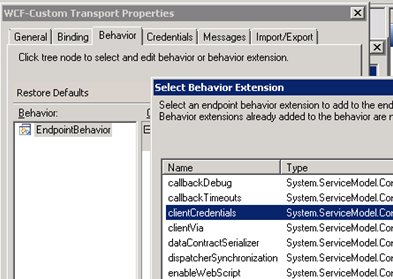
Now click on the “Behavior” tab and add an extension to the EndpointBehavior, select “clientCredentials”.
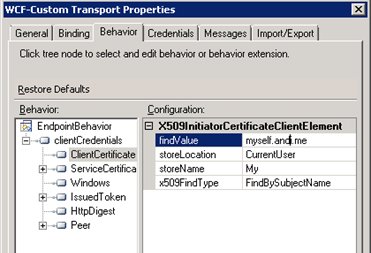
Expand the clientCredentials behavior and click “Certificate”.
Now we need to enter the information from our Client Certificate, for instance by entering the subject name of the certificate and choose “FindBySubjectName” as FindType.
For more options see: http://msdn.microsoft.com/en-us/library/system.security.cryptography.x509certificates.x509findtype(v=vs.110).aspx
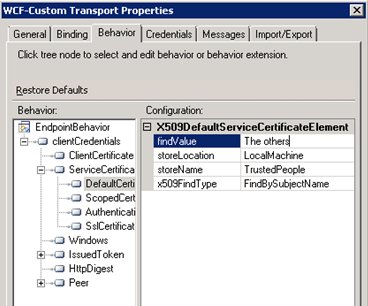
Expand ServiceCertificate, click “DefaultCertificate” and enter the information of the Service Certificate.
Finally click OK twice and start the Send Port, we are now ready for testing.
Subscribe to our RSS feed