In this second part I will describe how to setup IIS and a receive location in BizTalk in order to receive messages using 2Way SSL Authentication.
To follow the steps described in this blogpost you’ll need to have an existing BizTalk webservice published and running in IIS.
IIS:
This time we want to receive messages using SSL, so we have to add an https binding in IIS.
In order to do this we need a Server Certificate (Purpose=Server Authentication) linked to the hostname that is used in the url.
Generating a Self-Signed Certificate
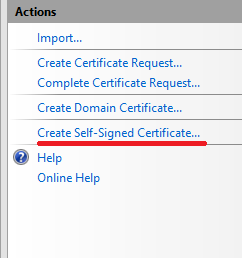
For testing purposes we will generate a Self-Signed certificate using IIS:
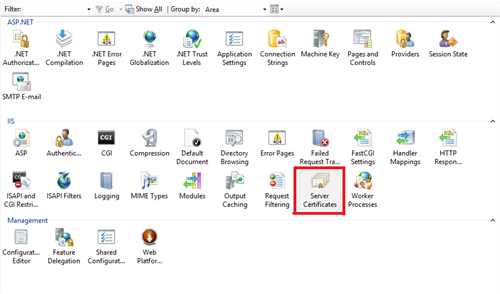
- Start the IIS Manager.
- Navigate to the Top Level.
- In the Features View double-click on “Server Certificates”.
- Click in Actions pane on “Create Self-Signed Certificate”
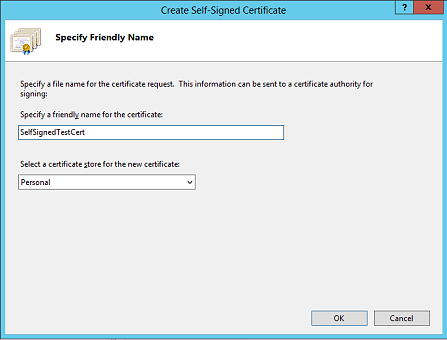
- Specify a friendly name, like SelfSignedTestCert, and click the OK button.
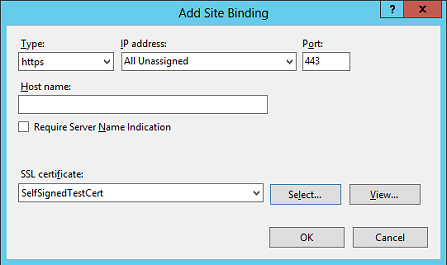
Setting up the https binding:
- In the IIS Manager select the website that contains the service (for instance the “Default Web Site”)
- In the Actions pane click “Bindings”
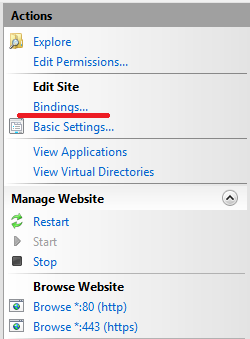
- Add an https Binding and select the Certificate you just generated with IIS and click “OK”

- Now you can browse the website via https, click on “browse” in the action pane:
Since you are browsing to localhost instead of the machine’s hostname, that the certificate expects, you will receive a warning that says that the certificate was issued for a different website.

So we’ll change the url to your machine’s hostname (https://yourmachinename) and try again. You should now see the default IIS page directly.
Now we will set the SSL settings of the webservice to Require SSL in order to make sure the webservice is no longer available via non-https.
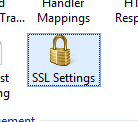
- Select the Web service and double click “SSL Settings” in the feature pane.
- Check “Require SSL” and select Require for Client certificates, this way we require the user to present his certificate in order to access the webservice.
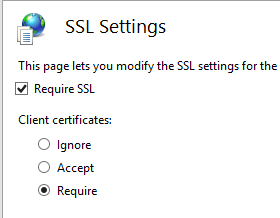
- Click “Apply”
BizTalk
That’s it for the IIS part. Now for the BizTalk part we’ll have to configure the receive location in BizTalk for SSL Authentication.
- Start the BizTalk Admin Console
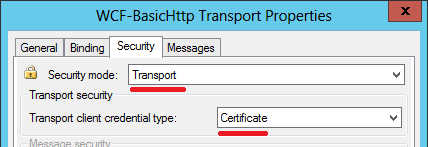
- Browse to your receive location, double click it and click “Configure”
- Select the “Security” Tab, Select “Transport” as Security mode
- Select “Certificate” as client credential type and click “OK”
We’re almost ready, but before we can start testing this we have to change a couple of setting in the webservice’s web.config.
So locate your web.config, open it and change the following settings:
- httpHelpPageEnabled=”true” set to “false”
- httpsHelpPageEnabled=”false” set to “true”
- httpGetEnabled=”true” set to “false”
- httpsGetEnabled=”false” set to “true”
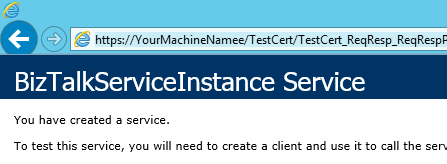
Now browse your webservice (using the https://yourmachinename url) and you’ll notice that you have to present a Client Certificate, select one and notice that the default page is presented.
Now you are ready to receive messages using 2Way SSL Authentication. Remember to issue an official certificate, issued by a Certificate Authority, for your production environment.
Subscribe to our RSS feed