all Technical posts

Sending E-mail using Microsoft Graph API

When you want to send an e-mail using Logic Apps, you add the Office 365 ‘Send an email’ action, authorize the account and you’re done. While this situation works most of the time, it can be inflexible as deployment cannot be fully automated.

To use Microsoft 365 in applications, Microsoft has Graph API. This blog post focuses on sending mail using Graph API.

Usually, the difficulty is not in the API itself (which is well documented, see Microsoft Learn), but getting the prerequisites right while avoiding potential pitfalls along the way.

In short you need the following:

  • A sys admin with Azure Admin permissions (and Exchange Online Admin permissions), which you only need once (and not each time like with a Logic App connector).
  • App registration with Mail.Send application permission (see caveat below).
  • User / mailbox with Microsoft 365 license

Limit Mail.Send permissions

If you leverage Graph.API and application permissions, you can let your application send e-mail on behalf of anyone in the organization. To restrict this, you apply a kind of ‘firewall rule’ by only allowing specific sender(s).

  1. First, go to https://admin.exchange.microsoft.com/
    Go to Recipients and create a new M365 mailbox/user (with possibly a distribution group, but a distribution group alone cannot e-mail).
  1. In Windows PowerShell (Admin), run the following, accepting any prompts with ‘Y’:
    Set-ExecutionPolicy RemoteSigned
    Install-Module PowershellGet -Force
    Install-Module -Name ExchangeOnlineManagement
  1. If installation was successful, run:
    Import-Module ExchangeOnlineManagement
  2. Connect to Exchange Online with your personal UPN (e-mail address) using:
    Connect-ExchangeOnline -UserPrincipalName UPN@example.org
    This will log you in interactively.
  3. Run the following command to replace App ID with your own. For each mail address you want to allow as a Sender, re-run the command.
    New-ApplicationAccessPolicy -AppId {YOUR_APP_ID} -PolicyScopeGroupId UPN@example.org -AccessRight RestrictAccess -Description "Restrict this app to members of distribution group Logic App emailer."

Testing Permissions

Changes may take 1 hour to take effect. Please run the following to test whether or not other users (mailboxes) have access. Replace UPN1 with a sample user.
Test-ApplicationAccessPolicy -Identity UPN1@example.org -AppId {YOUR_APP_ID}

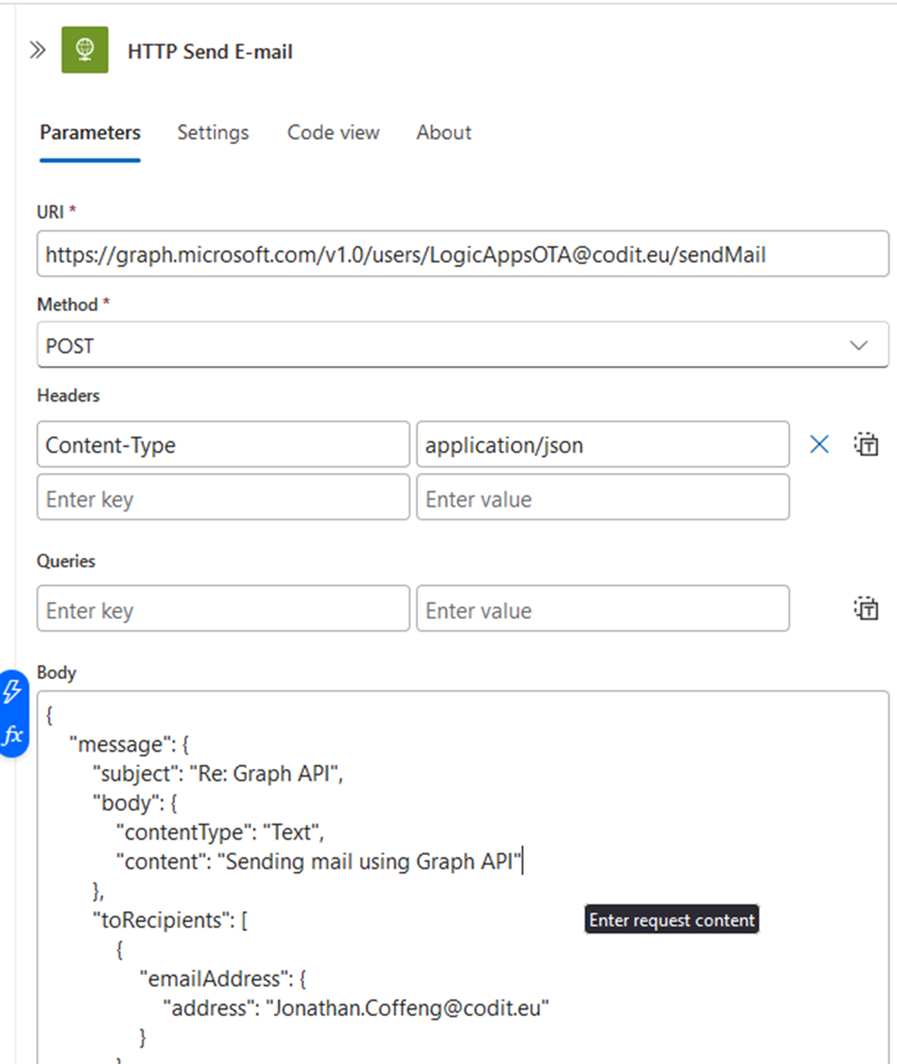
Setting Up In Logic Apps

In the screenshot below, you will see how to set up the connection using the HTTP connector. There is one POST endpoint with the Sender specified (in this case LogicAppsOTA@codit.eu), the body can either be json or a full MIME message (in which case Content-Type header changes to text/plain).

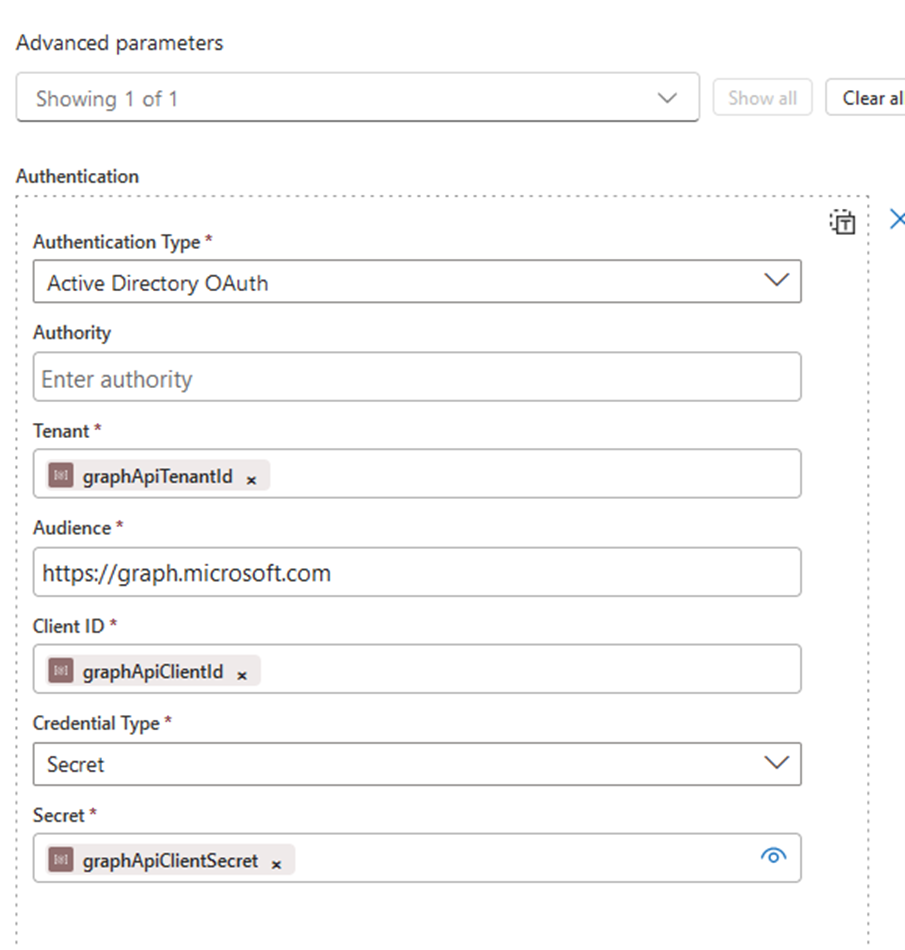
The following image shows how to set-up the authentication using Azure Active Directory OAuth (connecting to the app registration with the Mail.Send permission).

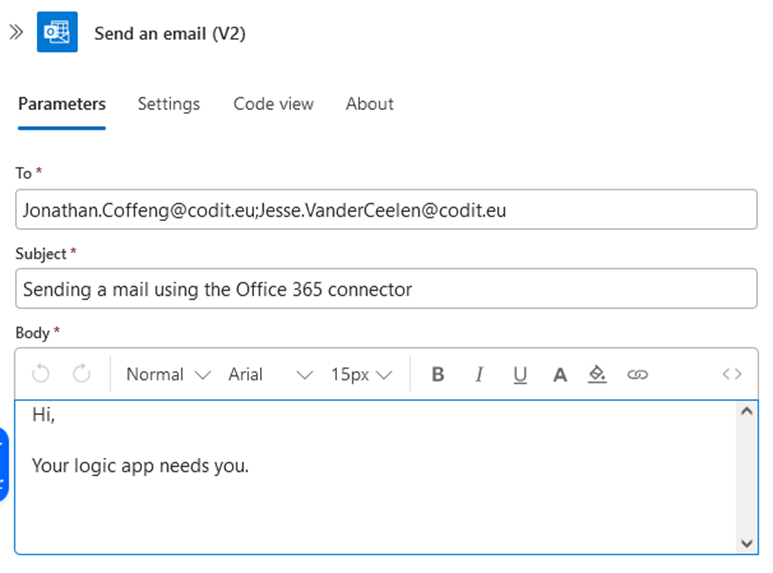
All in all, it is slightly more involved than the standard Office 365 connector, but it gives the following benefits:

  • User interaction to refresh or connect to Office 365 e-mail account is no longer necessary
  • Sender can be dynamic (no longer tied to user setting up connection)
  • More options in sending e-mail (MIME, json)
  • Potential re-usage of Graph API in other ways

Subscribe to our RSS feed

Hi there,
how can we help?

Got a project in mind?

Connect with us

Let's talk

Let's talk

Thanks, we'll be in touch soon!

Call us

Thanks, we've sent the link to your inbox

Invalid email address

Submit

Your download should start shortly!

Stay in Touch - Subscribe to Our Newsletter

Keep up to date with industry trends, events and the latest customer stories

Invalid email address

Submit

Great you’re on the list!