The series contains following parts:
- Part 1: Preparing the environment
- Part 2: Renewing and installing the ABAP Trial License
- Part 3: Configure the SAP System
- Part 4: Configure the SAP Master Data
Please do note that this setup is a setup that is created for a development/playground environment, this guide is not intended to give best practices or a production ready setup.
If you require any assistance or if you might have questions, don’t hesitate to put them in the comment section of this blog or give me a ping through twitter or email.
In this first part I will walk you through the entire installation procedure of the Mini SAP.
Download the Software
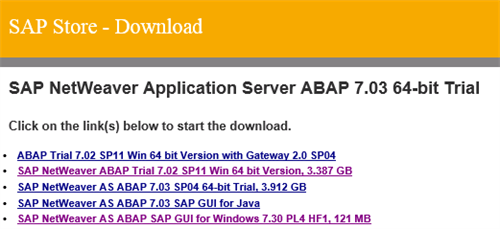
To start this guide, download the necessary software from the SAP website specified below and download the following packages:
- SAP Netweaver ABAP Trial 7.02 SP11 Win 64 bit Version
- SAP Netweaver AS ABAP SAP GUI for Windows 7.30
Download SAP Software
(Note: you will have to register yourself to the SAP Developer Network, you will require this logon later to extend your 3 months trial)
Pre-Requisites
I’m not going to run through all the system requirements as you can find them in the installation package you will download for the SAP website.
Nevertheless some requirements that you need to know before creating a blank VM to do this installation are:
Your operating system must be Windows Server 2008 or a Windows 7 64 bit Professional.
- Your hostname must not exceed 13 characters.
- Have around 75GB of free HD space.
- Download and install JRE with minimum version 1.4.2. Do not install a JRE with version higher than 1.6 because that is not supported. You will be able to start the installer, but the ABAP import step will fail.
Installing the Application Server
In this section I will provide a step by step buide and walk you through the installation of the SAP Application Server.
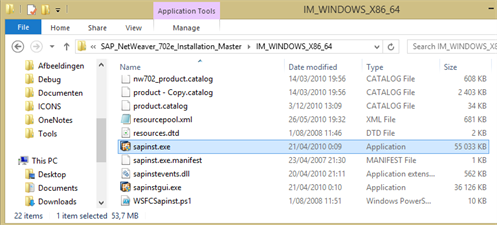
First step is to start the installation by navigating to SAP_NetWeaver_702e_Installation_MasterIM_WINDOWS_X86_64 and start the sapinst.exe.
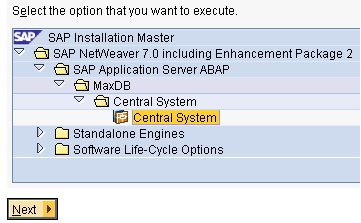
The option we will install is the MaxDB – Central System. Select this option and choose next to continue.
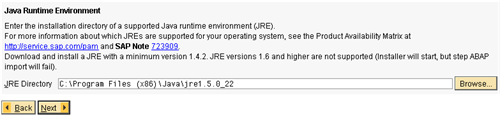
In the next window accept the license and click next. After that the installer will ask to provide the JRE Directory, provide the necessary directory and click next to continue with the installation.
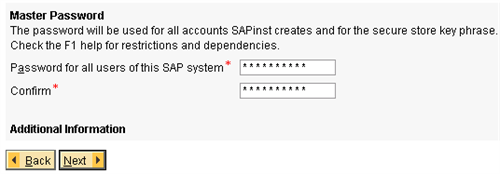
Choose the Master Password in the next window. This password will be used for all the accounts that SAP will use, so choose wisely!
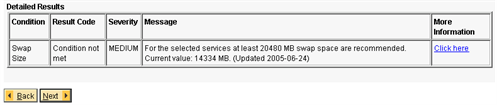
Your system will now be checked against a set of prerequisites, some prerequisites might fail as shown below, but you can continue the installation by clicking next.
In the screenshot below you can see what pre-requisites failed in my case.

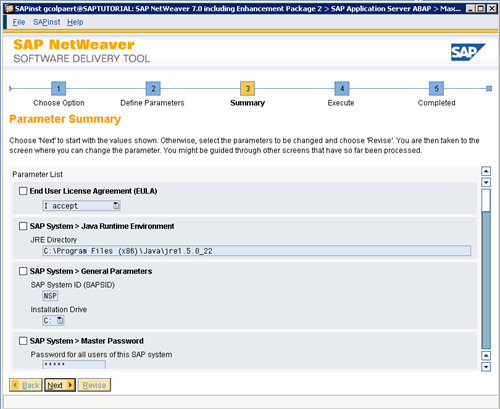
In the summary window click next to continue and start the installation.
The SAP MaxDB system will now be installed and you can follow the progress as shown below.
Go ahead and take a coffee while the SAP system is installing as this can some time.
For your reference, on my local VM it took around 19 hours, on the Azure VM (A4) that I used to prepare this blogpost it took around 2 hours.

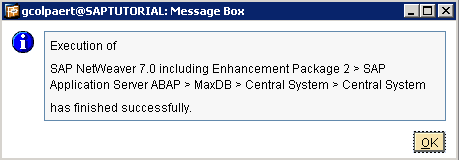
If all goes well you should see following Message Box popping up. Congratulations you are now the official owner of your own SAP system.
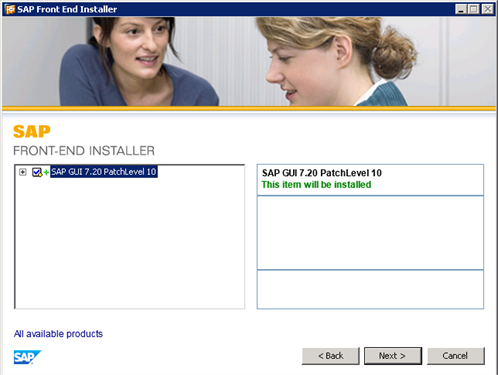
Installing the SAP GUI
Start the SAP GUI installer that is provided in the downloaded package from the SAP website.
The installer is a simple next-next-finish wizard, so I won’t go into details here.
If you require any assistance during this step, please put your questions in the comment section or give me a ping on twitter or via mail.
Validating the Install
Open the SAP Management Console and verify that your Message Server and Dispatcher are running.
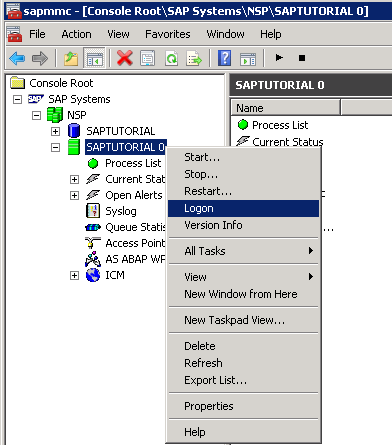
Right-click the main Node and choose Logon. In the SAP Logon Authentication screen provide SAP* as user and fill in the SAP Master Password.
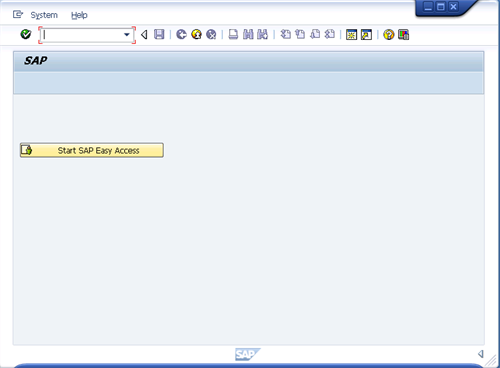
The SAP Interface should pop up.
You are now ready to start configuration of your SAP system, more details will be provided in the next part of this blogpost series.
Stay tuned!
Cheers,
Glenn Colpaert
Subscribe to our RSS feed