How to connect Logic App with Dynamics 365 for Finance and Operations
In the integration world, integration with CRM or ERP is a very common scenario. In order for an application to communicate with Microsoft CRM or ERP i.e. Dynamics 365 (or D365 for operations and finance), oAuth is the recommended method by Microsoft. There are some basic steps which we need to follow in order to connect any application with Dynamics using oAuth. In this article we will see how to perform those steps.
Logically there will be the following tasks:
- Register app in Azure Active Directory (The app must be registered on the same tenant where you have Dynamics license)
- Grant this app permission on AAD and Microsoft Dyamics ERP
- Map this app with an user in Dynamics
- Use this app’s ObjectID, ApplicationID and Key in third party application to authenticate with Dynamics
Now let’s see how to perform above tasks in step by step manner :
- Log in to Azure portal
- Go to Azure Active Directory
- Go to App registrations
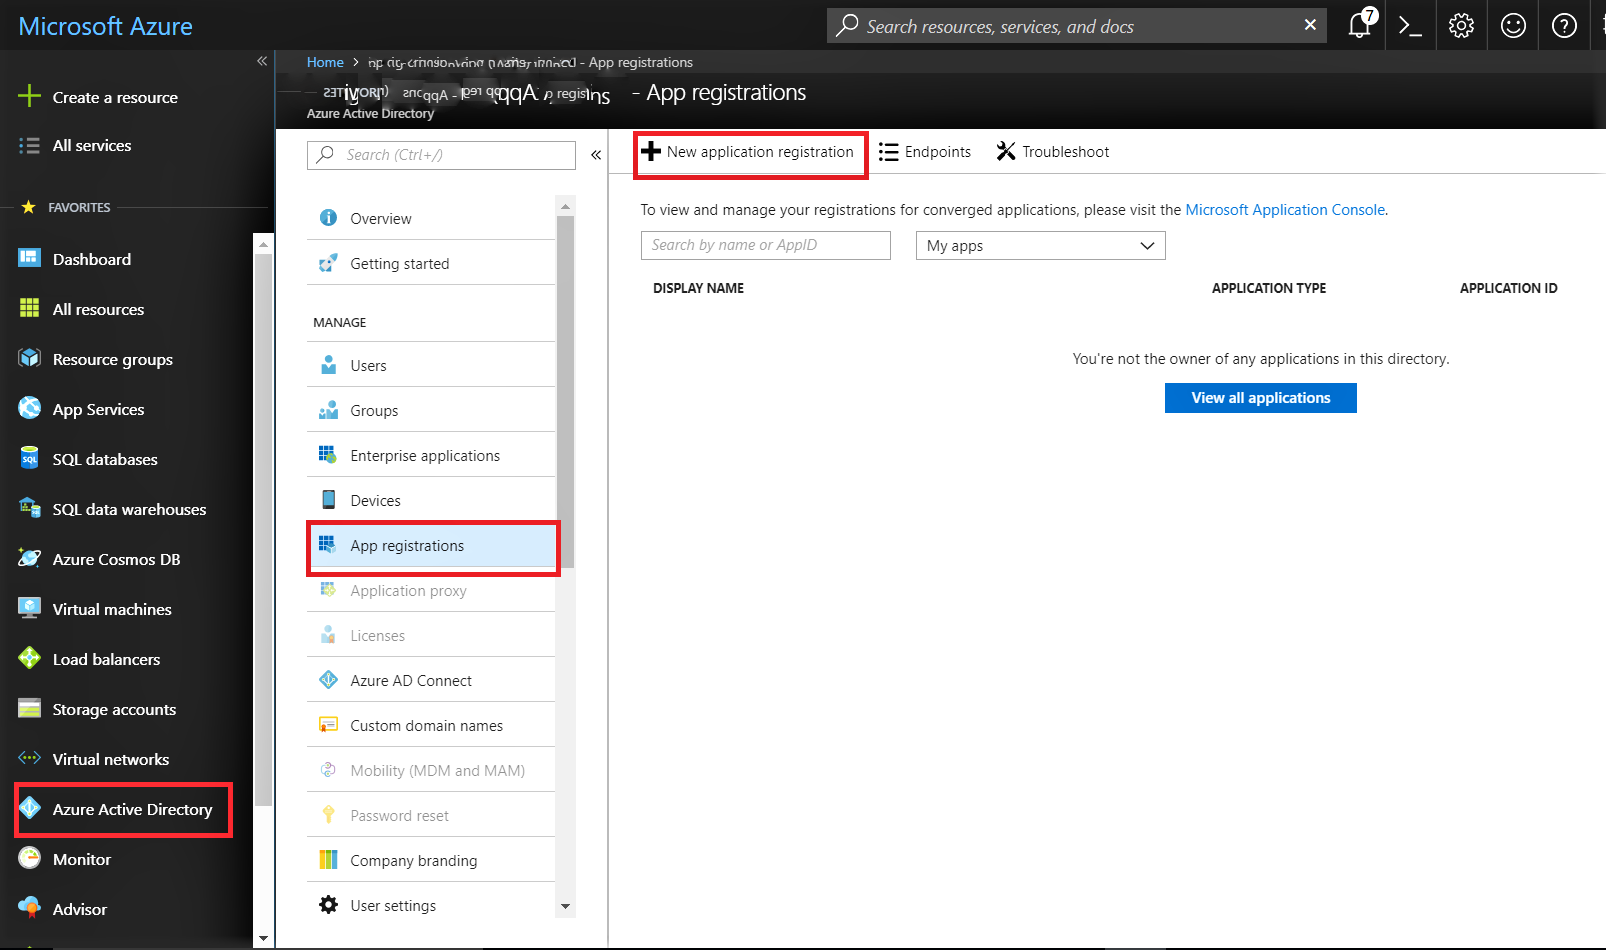
- Select option New application registration
- Give a name to app in Name and add URL of Dynamics environment in Sign-On URL https://xxxxx-dev.sandbox.operations.dynamics.com/
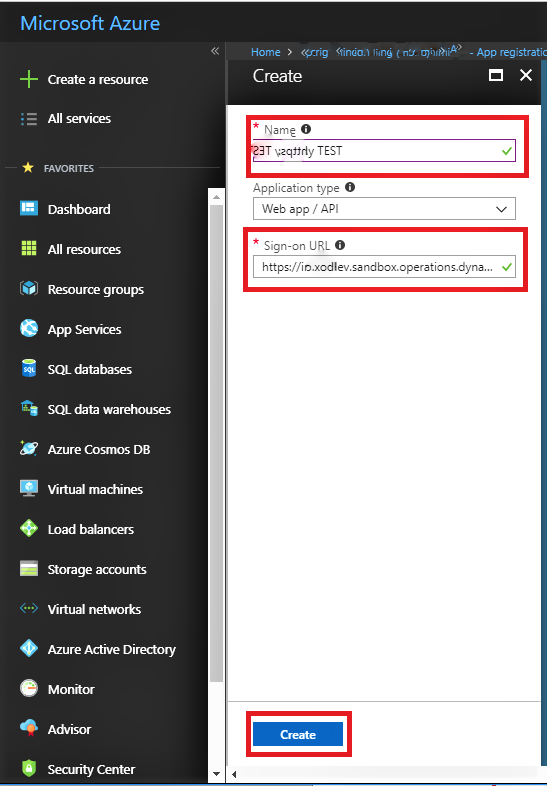
- Click on Create option
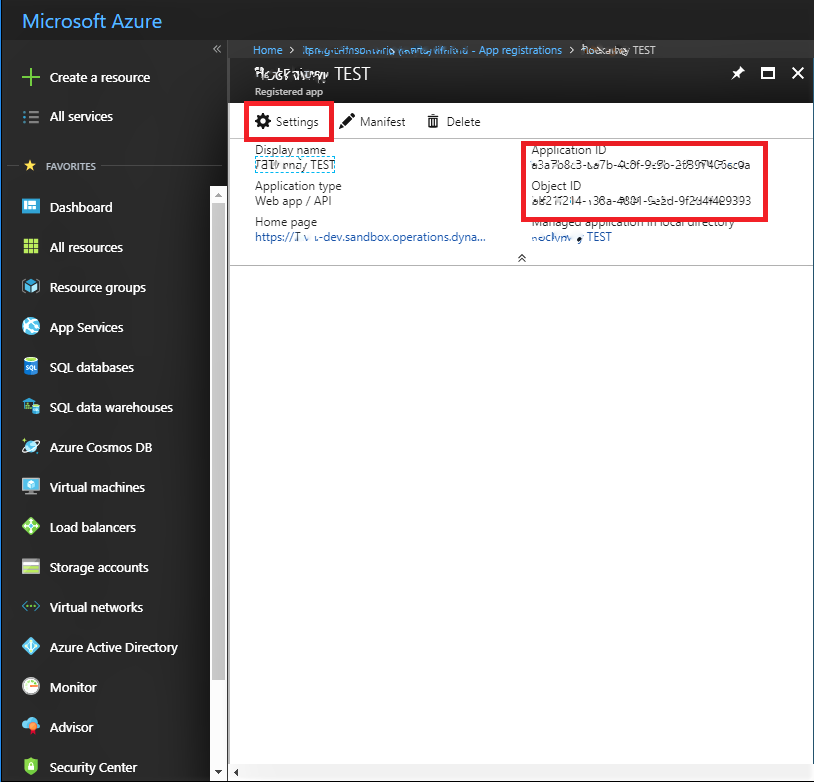
- Note down the Application ID and Object ID. You will need these IDs in your application which will communicate with Dynamics.
- Go to Settings option
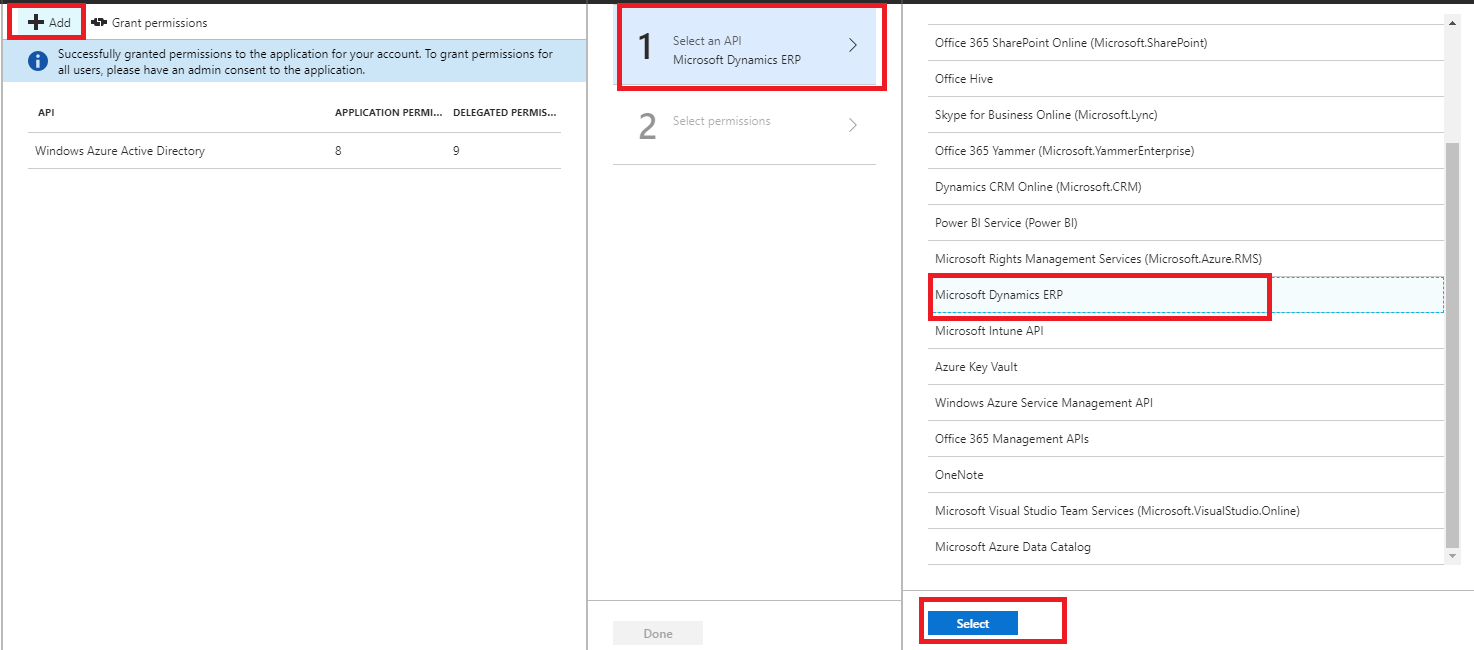
- Go to Required permissions and then to Grant permissions
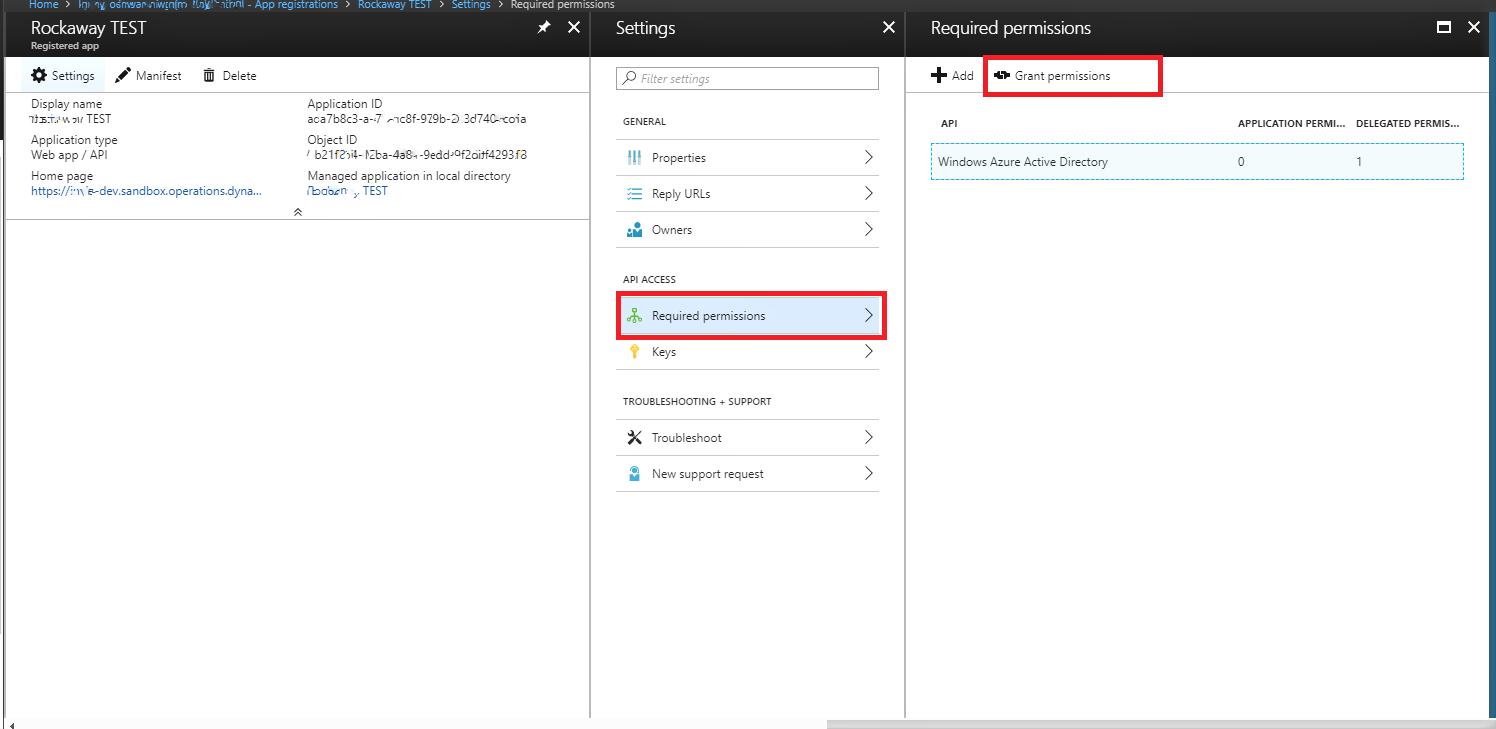
- Click on Windows Azure Active Directory
- Provide Application Permissions and Delegated Permissions (as per the following snapshot) and click on Save

- Click on Add option under required permission
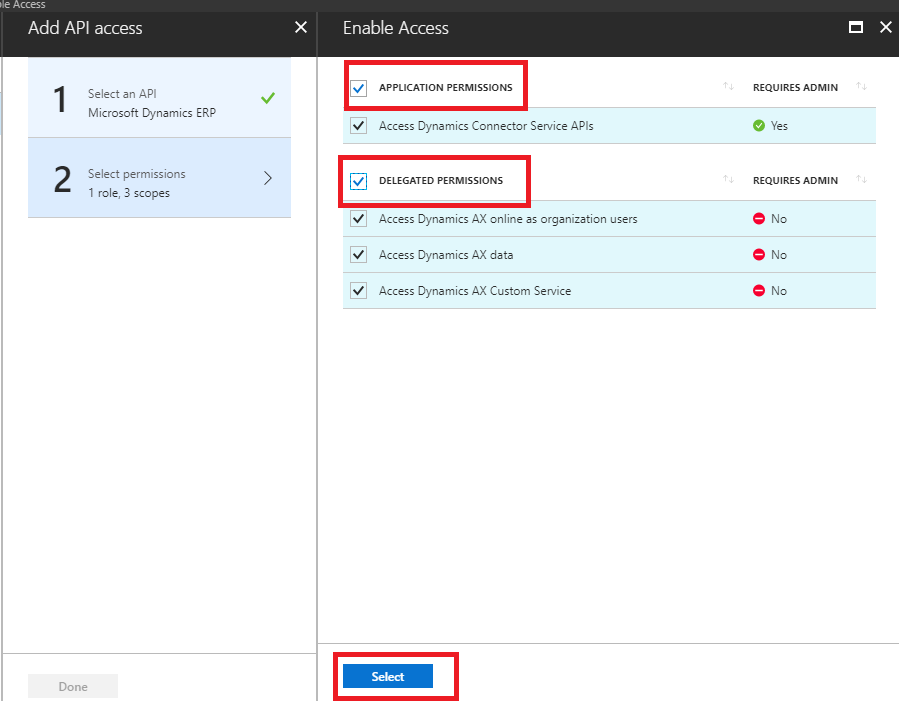
- Go to Select an API and from available API select Microsoft Dynamics ERP –
- Provide all rights (as per the following snapshot)
- Go to option Keys
- On right side enter Key description and and in Expires insert duration to Never expires. (This will depend upon your scenario as well. If you want to expire the key after certain time, then choose option accordingly)
- Copy value of the Key as it generates once. Remember that after saving the key, you wont be able to see it again. So you must be careful and copy the key before clicking on the Save button
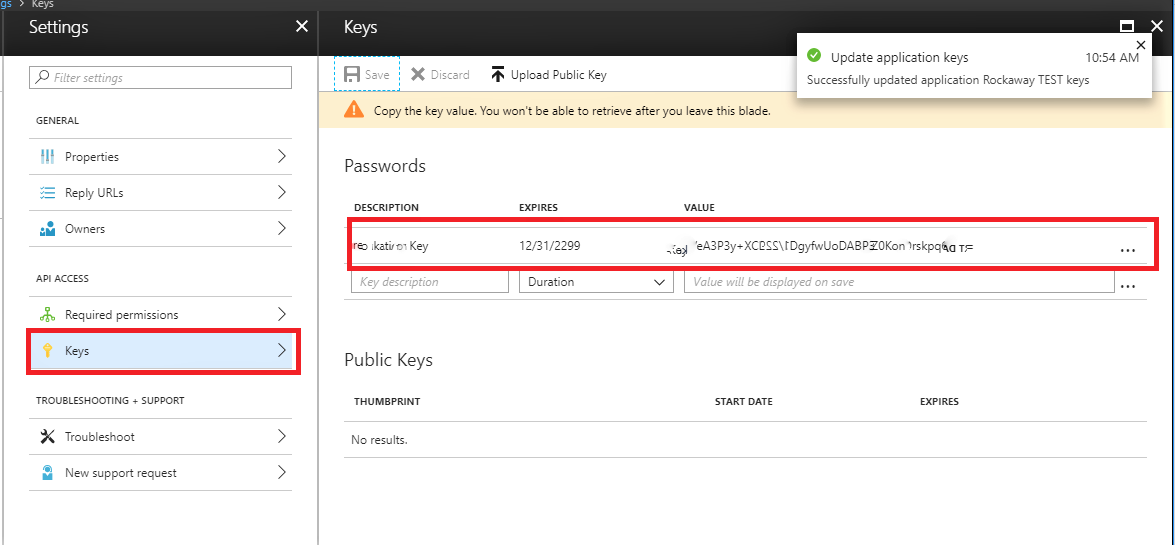
- Save changes. That’s all from Azure Active Directory side.
- Now Go to Dynamic Ax 365 for Finance and Operation on following page

- System administrator > Setup > Azure directory
- Create new record and add the app’s Client ID and Dynamics user. Provide a name for your record.
Now you are ready to connect from your application to Dynamics using the AAD registered app’s details.
Thanks for reading the article, happy connecting.
If you need further clarification regarding this topic, feel free to contact us via the form below!
Subscribe to our RSS feed