The Problem
The Problem with this DTA was that it was gigantic. Due to postponing the decision of creating a custom DTA cleanup job, or having the standard job in place the DTA just kept growing. This big DTA was causing some performance problems. And the handling of the files and backups was starting to be a problem.
As you can see, in this particular case the DTA was 3.8 Terabyte.
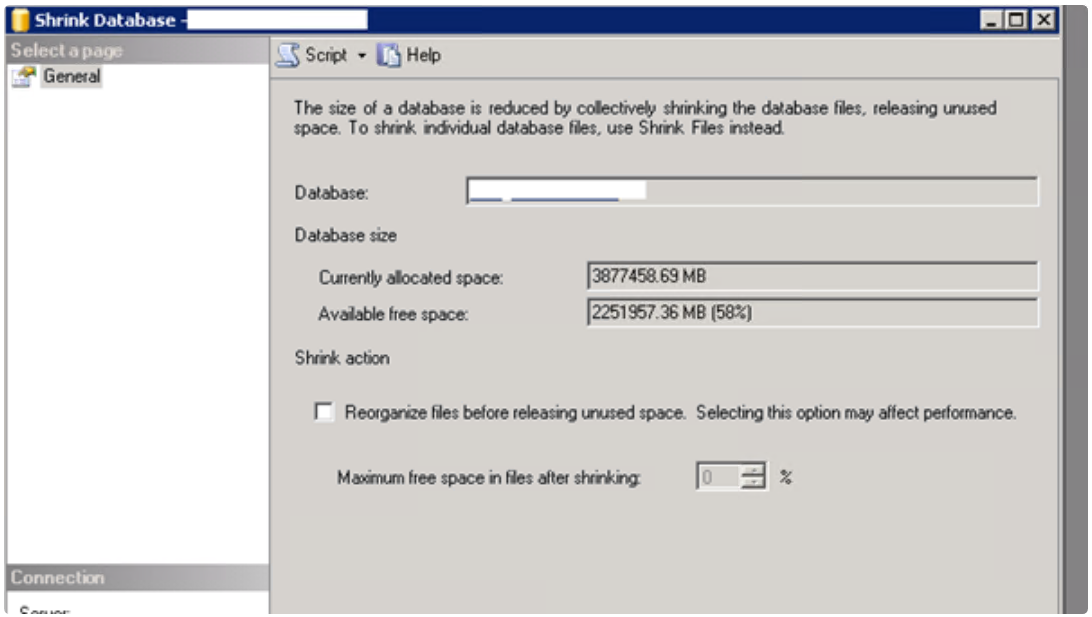
And how this is fragmented over different files.

Emergency Option
If things would go really bad, you could simply turn of the global tracking. But doing so, you would not have any logging of what messages where processed by the BizTalk environment. (More information, How to Turn off Global Tracking – http://technet.microsoft.com/en-us/library/bb203858.aspx)
The Solution
We did the following to solve this problem.
- Run a manual backup task.
- Purged the data in steps, moving 30 days closer each purge.
- Shrinked the Database in steps, moving 150 Gig each shrink
- Remove the emptied NDF files
- Turn on the standard Purge and Archive job
I’ll discuss every step in detail.
1. Run a manual backup task
By default the Purge and Archive job we want to activate will take a backup of data that will be purged. Each time the job runs, he looks up the date of the last succeeded backup in the table ‘dta_ArchiveHistory’.
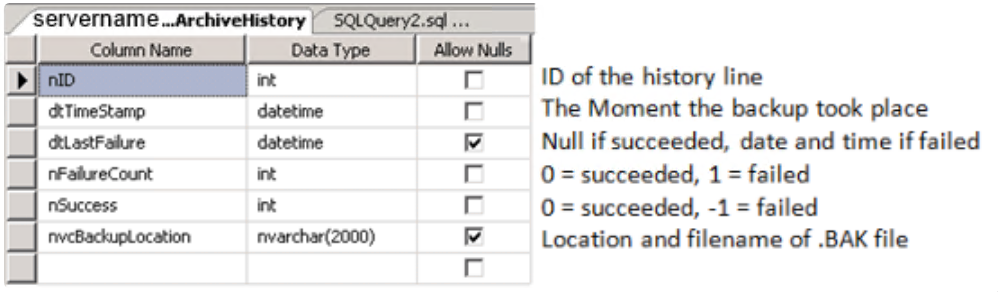
If the job needs to start purging data that has never been backuped before, he will take a backup of the entire database.
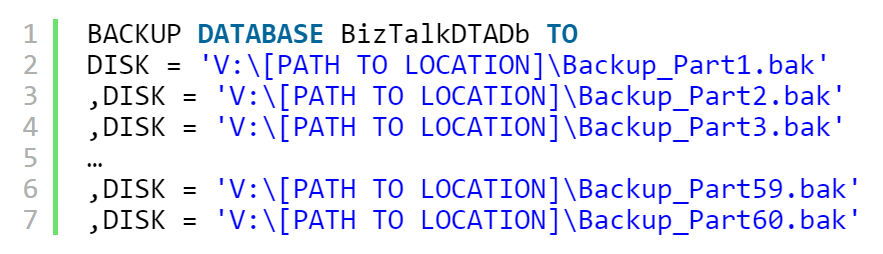
As we start this job for the first time, by default he will create a .BAK file with a size of 3,8 terabyte. That is something we want to avoid. So we will run a manual backup command that creates 60 smaller .BAK files. Then the files are easier to handle. After this, we also add a record to the ‘dta_ArchiveHistory’ to simulate a automated backupjob.
The script to backup a database into smaller pieces.
Result after 8 hours of processing.
1 | Processed 58499096 pages for database ‘BizTalkDTADb’, file ‘BizTalkDTADb’ on file 1.
2 | Processed 144149440 pages for database ‘BizTalkDTADb’, file ‘BiztalkDTAdb_2’ on file 1.
3 | Processed 10176256 pages for database ‘BizTalkDTADb’, file ‘BiztalkDTADb_3’ on file 1.
4 | Processed 132160256 pages for database ‘BizTalkDTADb’, file ‘BiztalkDTADb_4’ on file 1.
5 | Processed 150234616 pages for database ‘BizTalkDTADb’, file ‘BiztalkDTADb_5’ on file 1.
6 | Processed 121622 pages for database ‘BizTalkDTADb’, file ‘BizTalkDTADb_log’ on file 1.
7 | BACKUP DATABASE successfully processed 495341286 pages in 28821.353 seconds (134.270 MB/sec).
2. Purget the data in steps
After the backup, we want the old data to be removed from the database. We need to purge all the data older than 92 days. (because we want to have the data from the last 3 months in our DTA). We could just start the purge job and let it run. But this would mean we would be purging 3 years of data. This would probably take up to 2 weeks to process. And if it would fail, we would only see it in the end.
To solve this problem, we adjusted our purge strategy. This is the default job we would run.
1 | exec dtasp_BackupAndPurgeTrackingDatabase
2 | 0, –@nLiveHours tinyint, –Any completed instance older than the live hours +live days
3 | 92, –@nLiveDays tinyint = 0, –will be deleted along with all associated data
4 | 93, –@nHardDeleteDays tinyint = 0, –all data older than this will be deleted.
5 | ‘\\[FILE LOCATION], –@nvcFolder nvarchar(1024) = null, –folder for backup files
6 | null, –@nvcValidatingServer sysname = null,
7 | 0 –@fForceBackup int = 0 –
The first time we run the job, we want to only purge data older than 902 days. Meaning we would only purge a little amount of data. The 2nd time we purge data older than 872 days. The 3th time data older than 842 days. And so on. Until we purged all data older than 92 days.
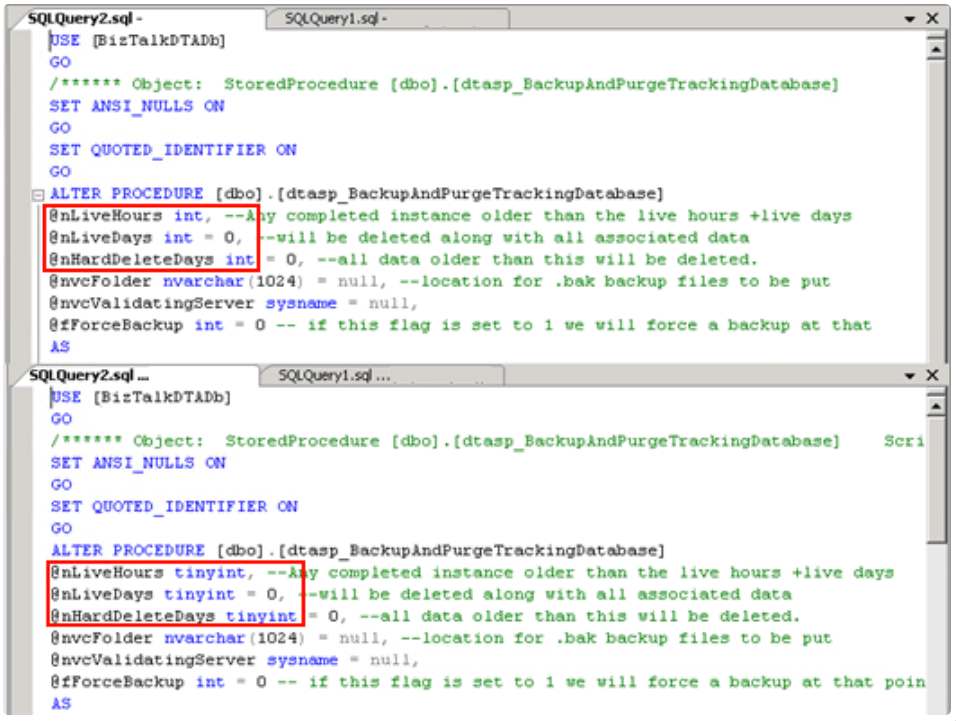
But there is one problem. The default job only supports tinyint as a value for nLiveDays and nHardDeleteDays. Tinyint can have a maximum value of 255. So we created a temporary copy of the default job and adjusted the parameter type. From TinyInt to Int.
3. Shrinking the database in steps
The next step in our process to get a smaller database is to shrink the database itself. SQL manages the shrink of its databases very well. The BizTalk environment stayed stable during the entire process.
Again the same problem occurred. We don’t want to shrink the entire database at once. We want to control this. Because we only want to let it shrink by night (to limit the risk of pushing the SQL server to far). And we want to decide which files go out, and on witch disk the data is. As you can see, the data is spread out over several file locations.

After the shrink, this was the data was divided like this.

So we want to shrink in this order:
- Shrink and remove 4.
- Shrink and remove 3.
- Shrink and remove 5
- And if possible, shrink and remove 2.
The query to shrink a file to a predefined size.

We chose to shrink per 200 000 MB. As the elaps time for this was around 11 hours and 40 minutes.
4. Remove the emptied NDF files
After we shrinked the file to an acceptable minimum size of 50 000 MB. We emptied it and removed it from the filegroup.

To empty a file and remove it from the filegroup.
![]()
The elapsed time for this Query was around 5 hours 30 minutes.

You should always make sure that you have a file where autogrowth is enabled. If the DTA should grow, or the file you are removing contains more data than the free space that is available in the other files. The files you set to autogrow will grow.
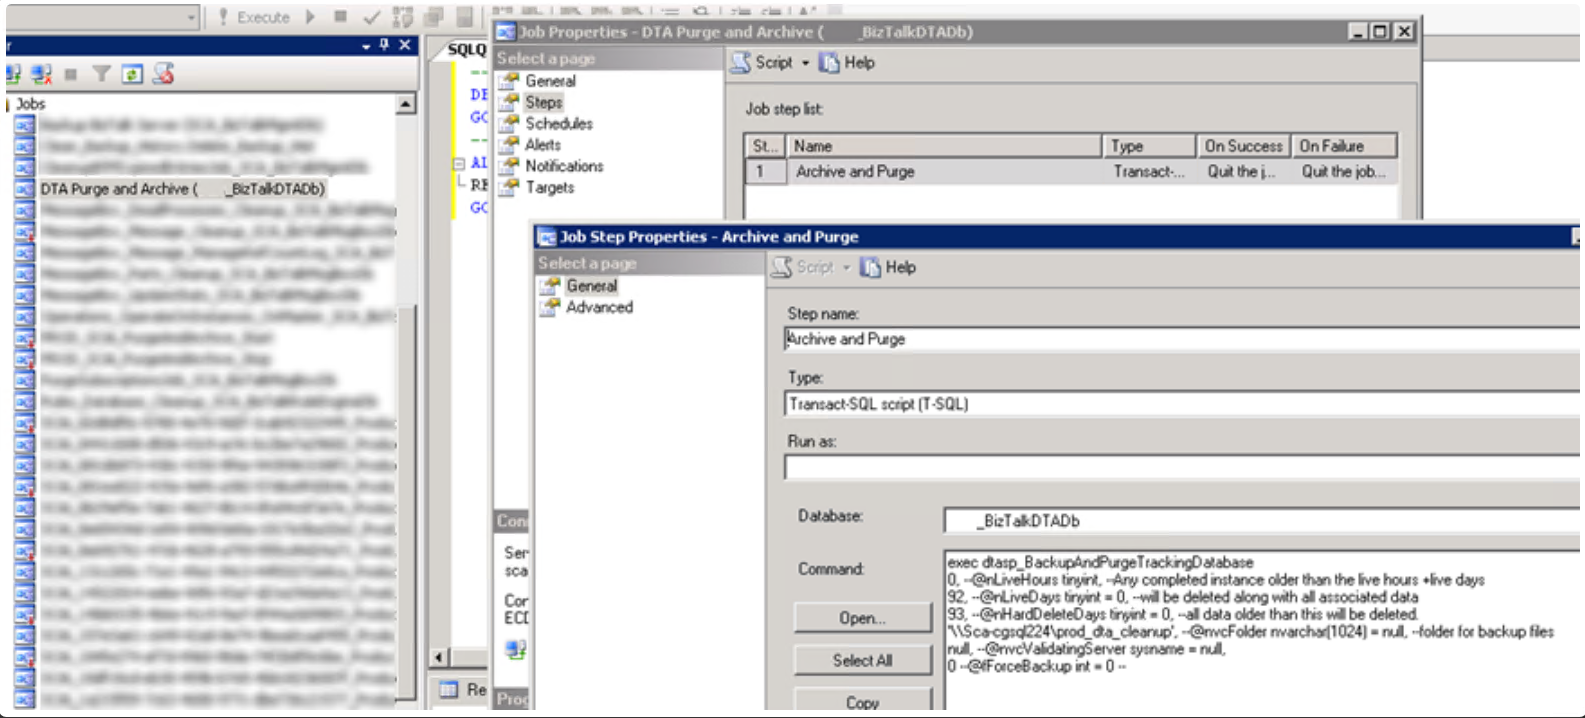
5. Turn on the standard purge and arhive job
After all this, you can turn on the default purge and archive job. Biztalk has its own DTA Purge and Archive job. Where you need to set your settings on the step Archive and Purge. Schedule this job to run daily. And every nLiveDays (92 in this case) the job will create a .BAK file on the file location you defined.
Tips and Problems
Shrink fails
![]()
This bug occurred to me twice. To solve, you increase the allocated space for this file by 1 MB. And try again. Now it should work. The reason for this error is not clear to me. As its not the same as pointed out on the Microsoft support page. But the solution did work.
Zip the bakckup files
After we took the 3,8 Terabyte backup we had 60 files of around 65 Gigabyte. We zipped those files with 7zip (http://www.7-zip.org/). The result was that a file of 65 gigabyte was now only 1,14 gigabyte on disk.
– Good luck! Thanks for reading!
Subscribe to our RSS feed