A desktop environment in the Cloud
I recently created a virtual machine in the cloud with the purpose to use this as my own remote desktop. For me, one of the biggest benefits of the IaaS model is the fact that I can easily access the machine from anywhere with any device and I don’t need to worry about buying or maintaining hardware, or Windows licenses.
In general, the biggest cost for Microsoft Azure Virtual machines is “compute hours”. Which means, I pay for every minute my remote desktop uses CPU power. To limit the costs, I perform a startup in the morning and shutdown the machine in the evening.
Starting a virtual machine in the morning means I need to login in the Azure management portal, perform some clicks and wait for the provisioning since this can take up to 30 minutes in my experience. Afterwards I provide my credentials and establish a remote desktop connection. The annoying part is I have to do this manually every morning.
I now automated this process: when my laptop boots, the Virtual Machine spins up, automatically connects and displays the virtual machine with my account in a remote desktop session. The reverse process also happens in the evening: when I pull down the lid of my laptop, the Azure VM will shut down.
Pre Requirements
PowerShell with Azure SDK
The first requirement is that we need to install PowerShell and the SDK of Microsoft Azure. The installation can be found here:
http://www.windowsazure.com/en-us/downloads/?fb=en-us
It might be possible you’ll need to update your version of PowerShell as well.
Azure virtual machine
If you do not have an Azure Virtual machine, create one through the portal and make sure to enable the remote desktop endpoint:

Azure subscription file
To access your account through PowerShell, download your azure subscription file on this link:
https://windows.azure.com/download/publishprofile.aspx
User rights
User rights to edit the group policy. According to MSDN: “You must be logged on as a member of the Domain Administrators security group, the Enterprise Administrators security group, or the Group Policy Creator Owners security group.”
Create the script
Provision virtual machine and start remote desktop session
The startup script can be found below.
The service name of the Virtual machine can be found if you grab the DNS name of het VM and remove the “.cloudapp.net” string.
The name of the VM is as shown in the Azure management portal.
Azure_vm_startup.ps1
#Import Azure PowerShell module and your publish settings file
Import-Module ‘C:Program Files (x86)Microsoft SDKsWindows AzurePowerShellAzureAzure.psd1’
Import-AzurePublishSettingsFile ‘”C:start_vmVisual Studio Premium with MSDN-1-3-2014-credentials.publishsettings”‘
#Access the VM
$vm = Get-AzureVM -ServiceName ‘myservicename’ -Name ‘myname’
#Start the VM
$result = Start-AzureVM -ServiceName $vm.ServiceName -Name $vm.Name
do{
$vm = Get-AzureVM -ServiceName $vm.ServiceName -Name $vm.Name
sleep 5
}until($vm.PowerState -eq ‘Started’)
#Read the remote desktop adress
$endpoint = Get-AzureEndpoint -Name “Remote Desktop” -VM $vm
$remotedesktopurl = $vm.ServiceName + “.cloudapp.net:” + $endpoint.Port;
#Start remote desktop session
mstsc /v:$remotedesktopurl /f
Shutdown the virtual machine
Azure_vm_shutdown.ps1
#Import Azure PowerShell module and your publish settings file
Import-Module ‘C:Program Files (x86)Microsoft SDKsWindows AzurePowerShellAzureAzure.psd1’
Import-AzurePublishSettingsFile ‘C:start_vmVisual Studio Premium with MSDN-1-3-2014-credentials.publishsettings’
#Acess the VM
$vm = Get-AzureVM -ServiceName ‘myservicename’ -Name ‘myname’
#Stop the VM
if($vm.PowerState.Equals(“Started”)){
$result = Stop-AzureVM -ServiceName $vm.ServiceName -Name $vm.Name -Force
}
Create logon and log off triggers
To trigger the start and stop scripts, I used the group policy in Windows, which gives us the possibility to trigger scripts at the logon and log off event of the user.
Open the Group Policy editor:
Start => Run => gpeditor.msc
Navigate to the Scripts section of the user:
Local Computer Policy => User Configuration => Windows Settings => Scripts (Logon/Log off)
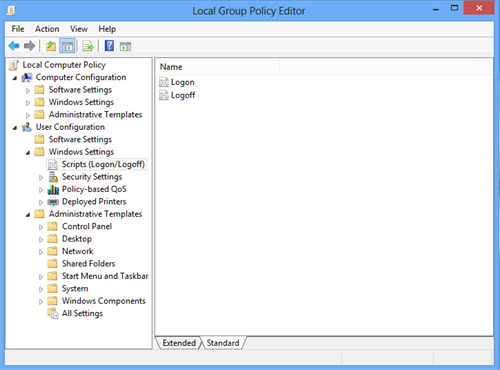
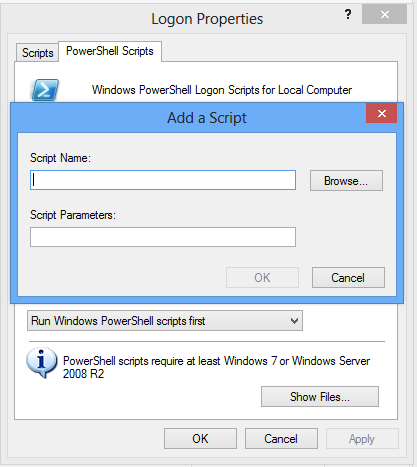
Double click the Logon record, navigate to the tab PowerShell scripts, Click add and add navigate to your script.
Repeat the same step for the log off task
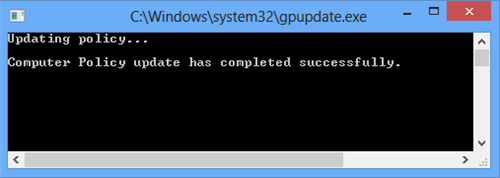
To apply the changes immediately, update your Group Policy:
Start => Run => gpupdate
Windows Policy Pitfalls
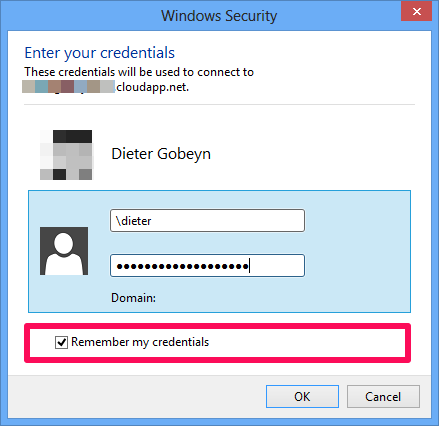
If you log off your user, and logon again, you should see a remote desktop login popup.
The first time you’ll need to provide your credentials and click “Remember my credentials”.
Rarely enough, you’ll see that the button “Remember my credentials” won’t work. Windows is by default disabled to remember those credentials.
I tested this on my Windows 7 and saw this message: “Your system administrator does not allow the use of saved credentials to log on to the remote computer because its identity is not fully verified. Please enter new credentials”
Luckily, we can change this behavior, so open again to the group Policy Editor (Start => Run => gpeditor.ms)
Navigate to the Credentials delegation section:
Local Computer Policy => Computer Configuration => Administrative Templates => System => Credentials Delegation
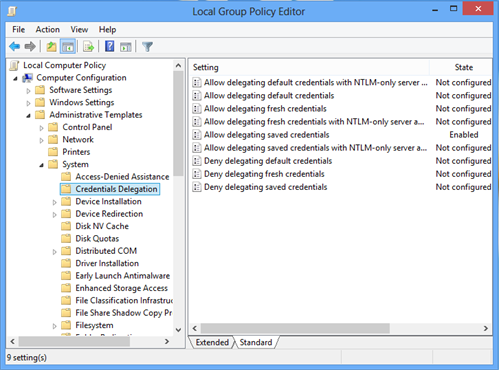
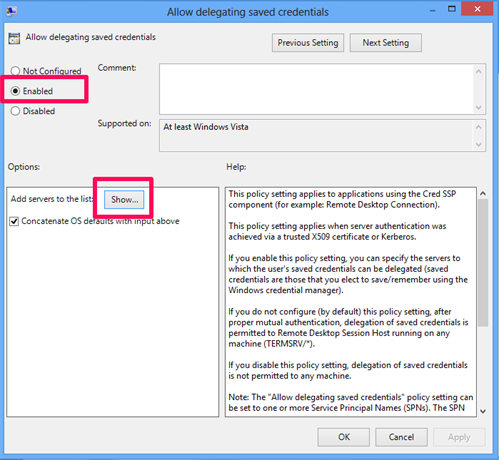
Double click the record “Allow delegation saved credentials” and click enabled in the section on top.
Click the “Show..” Button and add “*” to the list.
Update the Goup Policy again (start => Run => gpupdate) and log off, logon your user account.
Conclusion
We learned some basics on how to use PowerShell with Microsoft Azure: how to start and stop a VM and dynamically and start a remote desktop session based on configured endpoints.
The solution will give us a lot of comfort in the morning, as long as the machine is connected to the internet at logon and log off time!!
Automating provisioning of a virtual machine saves us time and money. You can now enjoy your coffee even more in the morning.
Subscribe to our RSS feed